

Stick With It: Painter’s Tape Tricks That Actually Work
Ever peel off painter’s tape only to find jagged lines or paint bleed underneath?
Or wonder why your taped edges never look as clean as a professional paint job?
In this post, you will learn practical, easy-to-follow painter’s tape tips, from choosing the right tape to applying it correctly and removing it at the perfect time.
By the end, you will know how to get sharper lines, avoid common mistakes, and make your interior painting job look cleaner and more polished.
If you would rather skip the trial and error, reach out to Tribble Painting Company by calling or filling out the contact form.
Now let’s learn a few painter’s tape tips to help you get DIY results you can feel good about!
7 Painter’s Tape Tips for Clean, Professional Paint Lines
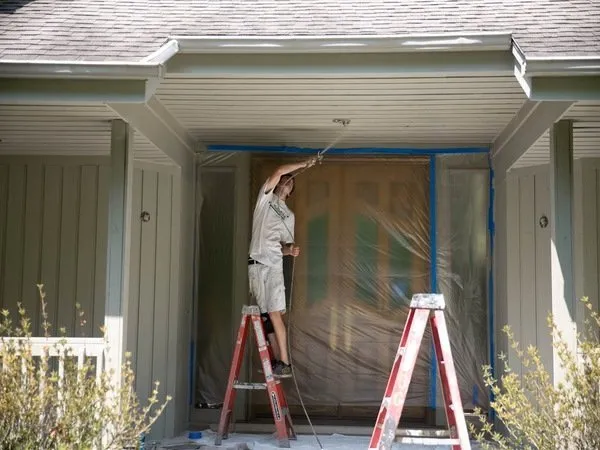
Getting clean, professional-looking results comes down to using the right techniques for how to use painter’s tape and paying attention to detail.
These painter’s tape tips focus on what actually makes a difference during painting, especially on walls, ceilings, interior trim, and window frames.
- Use the right painter’s tape for the surface and conditions
Painter’s tape is not created equal. The correct tape depends on the surface type, whether you are working on wood, metal, drywall, or delicate surfaces. Choosing the right tape helps prevent bleeding and surface damage. - Apply painter’s tape only to clean, dry surfaces
Tape will not stick well to dirt, grime, or moisture. A clean surface helps the tape adhere firmly and stay in place throughout the project. - Use short sections of tape for better control and straighter lines
Shorter strips give you better control, especially around edges, corners, and light switches. Long pieces are more likely to twist or lift. - Press and seal the tape edge to prevent paint bleed
After applying tape, press it firmly along the edges. This seal is what creates crisp lines and sharp lines instead of messy bleeding. - Paint away from the tape edge, not toward it
Whether you are using a brush, roller, or paint sprayer, always move away from the taped edge. This technique reduces pressure that can force wet paint under the tape. - Remove painter’s tape at the correct time
The best time to remove the tape is when the paint is dry to the touch but not fully cured. Waiting too long increases the risk of peeling paint. - Pull painter’s tape slowly at a 45-degree angle
Pull the tape back on itself, slowly and firmly. This method helps create clean lines and prevents tearing along the edges.
Choosing the Right Painter’s Tape for the Job
Why Not All Painters Tape Is the Same
Painter’s tape varies in adhesive strength, flexibility, and material.
Using the wrong tape is one of the most common causes of bleeding and surface damage.
A tape designed for one surface may stick too aggressively or not enough on another.
Key points to consider:
- Adhesive strength affects how well the tape will stick and release
- The correct tape helps protect surfaces without leaving residue
- Tape performance changes based on surface and room conditions
Some brands of painter’s tape feature different colors based on the type of surfaces they work best on.
Always follow the manufacturer’s recommendations for the specific type of painter’s tape to use on different surfaces.
Matching Tape Type to Surface Conditions
Different surfaces require different masking approaches.
- Delicate surfaces, such as freshly painted walls or finished wood, benefit from low-tack tape
- Rough or exterior surfaces need stronger adhesion to stick firmly, especially when painting exterior trim
- Newly painted surfaces often require specialty tape designed to release cleanly
Matching the tape to the surface type makes all the difference in achieving crisp edges.
Tape Width and Coverage Considerations
Using the right width improves both protection and control.
- Narrow tape works best for corners, trim details, and straight line work
- Wider tape is better for baseboards, window frames, and doors
- Tape and masking tape with attached plastic sheeting help cover and protect large areas
Proper Surface Prep Before Applying Painter’s Tape
Why Surface Prep Matters More Than Tape Brand
Even premium tape will fail without proper prep.
Dust, dirt, grease, and moisture prevent tape from sticking and sealing properly.
Poor surface prep leads to bleeding and uneven edges.
How to Prep Surfaces Correctly
Before applying tape:
- Wipe the surface to remove dust, grime, and dirt
- Allow surfaces to dry completely
- Inspect edges for debris, cracks, or uneven buildup and scrape loose paint if needed
- Lightly sand if needed to improve adhesion
Good masking always starts with house prep, not tape application.
How to Apply Painter’s Tape Correctly
Using Short Tape Sections for Straighter Lines
Short tape strips conform better to corners, curves, and edges.
They reduce lifting and bubbling, especially around trim, ceilings, and walls.
Benefits include:
- Better control during applying tape
- Cleaner alignment along edges
- Less risk of tape pulling away during painting
Pressing and Sealing the Tape Edge
After applying tape, press it firmly into place.
Helpful tools and techniques:
- Use your finger to press along the edge
- A putty knife or plastic card can help seal the tape evenly
- Firm pressure ensures the tape sticks and seals properly
A strong seal is key to creating crisp lines.
Overlapping Tape Strips the Right Way
When one strip ends and another begins:
- Overlap slightly to prevent gaps
- Keep overlaps smooth to avoid paint buildup
- Overlapping also makes it easier to remove the tape later
How to Prevent Paint Bleeding Under Painter’s Tape
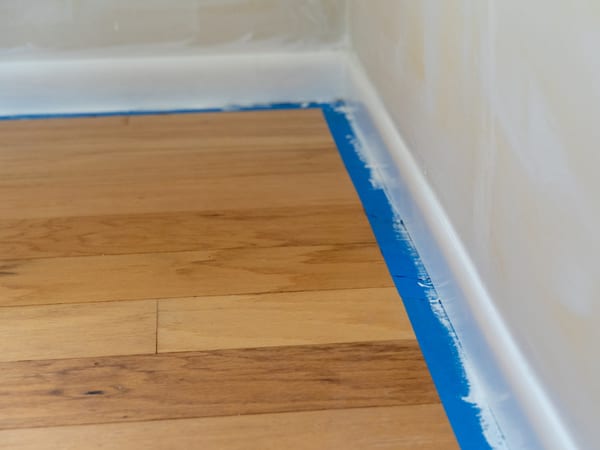
Sealing the Tape Edge Before Painting
One of the most effective techniques to stop bleeding is sealing the tape edge.
How it works:
- Apply a thin coat of the existing wall color along the tape
- This seals small gaps before applying the new paint color
- Once dry, apply the final coat for clean lines
Brush and Roller Technique Near Tape
Technique matters just as much as tape.
- Paint away from the tape edge
- Avoid overloading your brush or roller
- Lighter pressure reduces bleeding and buildup
These techniques help create sharp lines and a flawless finish.
When and How to Remove Painter’s Tape
Best Time to Remove Painter’s Tape
Timing affects the final result.
- Remove the tape when the paint is dry to the touch
- Do not wait until the paint fully cures
- Removing too late increases tearing and peeling paint
Proper Painter’s Tape Removal Technique
To remove the tape safely:
- Pull slowly and steadily
- Pull at a 45-degree angle
- Keep the tape close to the surface as you pull
If resistance occurs, score lightly along the edge with a utility knife before you remove the tape.
What Happens If Painter’s Tape Is Left On Too Long
Leaving tape on too long can cause:
- Paint to dry over and under the tape
- Jagged edges instead of clean lines
- Damage to walls, trim, or ceiling surfaces
Common Painter’s Tape Mistakes to Avoid
Applying Painter’s Tape Too Early
Applying tape too far ahead of painting can cause:
- Adhesive to weaken
- Increased bleeding
- Sticky residue on surfaces
Skipping Surface Prep
Skipping prep is one of the most common DIY painting mistakes. Tape cannot stick properly to dust, grime, or moisture.
Using the Wrong Tape on the Wrong Surface
Using incorrect tape can:
- Damage wood or metal
- Pull paint from walls
- Harm delicate surfaces or carpet
Pulling Tape Too Fast or at the Wrong Angle
Fast removal or pulling straight out can:
- Tear paint
- Ruin crisp edges
- Undo otherwise good masking work
Using Painter’s Tape for Design and Detail Work
Creating Straight Lines and Accent Patterns
Painter’s tape can help create:
- Clean stripes
- Color blocking
- Geometric shapes
Using a pencil to mark guides before applying tape helps keep designs straight and consistent.
Painter’s Tape on Textured or Uneven Surfaces
Textured surfaces like brick or heavy drywall texture are difficult surfaces.
Tips include:
- Use shorter tape sections
- Press firmly and seal carefully
- Understand that tape alone may not guarantee perfect lines on textured surfaces
Professional Painter Practices vs. DIY Painter’s Tape Use
Why Prep and Masking Take More Time Than Painting
A professional painter spends significant time on masking and prep. Clean lines and crisp edges are created before the first coat of paint goes on.
Good masking helps:
- Protect surfaces
- Improve results
- Reduce touch-ups
When Painter’s Tape Isn’t Enough
Some situations require more than tape:
- Caulking gaps before painting
- Repairing damaged edges
- Custom masking for complex trim
Final results depend on surface condition, material, and proper techniques, not just tape.
Ready for Sharper Lines and Less Stress? Trust Tribble Painting Company to Handle the Hard Part

Now you know how the right tape, proper prep, and smart techniques create crisp lines, clean edges, and a more professional-looking paint job on your walls, ceiling, trim, and window frames.
These painter’s tape tips help you avoid bleeding, peeling paint, and frustrating touch-ups that can derail a project fast.
When you are ready to skip the prep, masking, and guesswork, Tribble Painting Company can take care of your interior and exterior painting from start to finish.
Our expert house painters handle every detail so your Ann Arbor home looks polished, protected, and done right the first time.


